Holiday Gifts For My Players
For the holiday season, I wanted to get my players something. They have been very patient with me as a first time DM and have really dove into the campaign in ways that I never would have expected. I really couldn’t have asked for a better group. To celebrate them (and their patience during this break while I welcome a daughter to the family) I wanted to do something unique.
What I ended up with was something that I felt was personal and specific enough for our campaign but could also be used in other places.
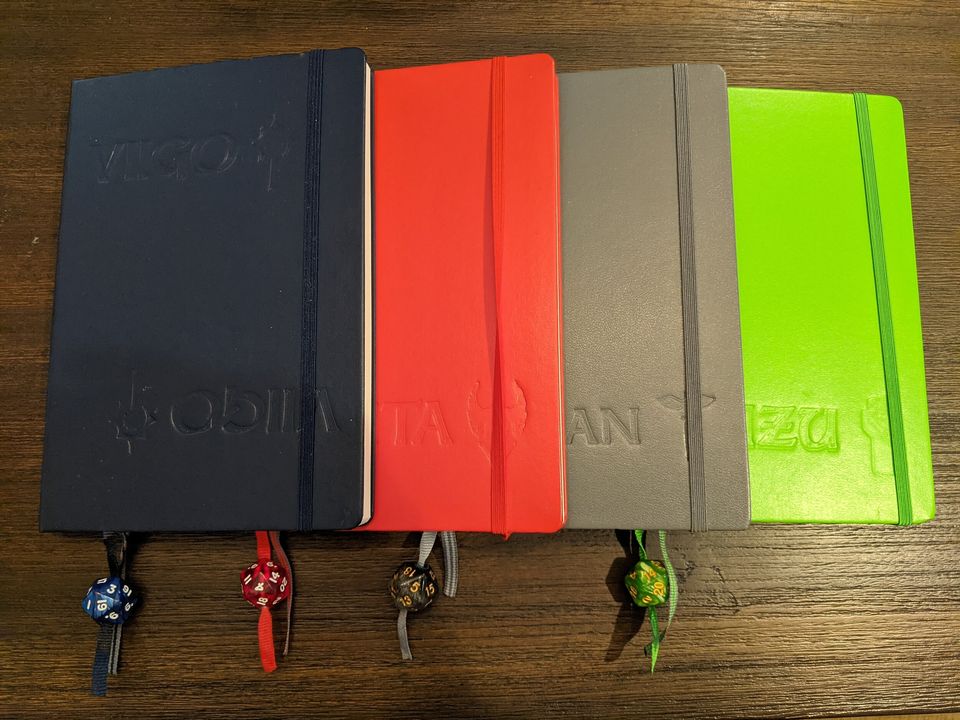
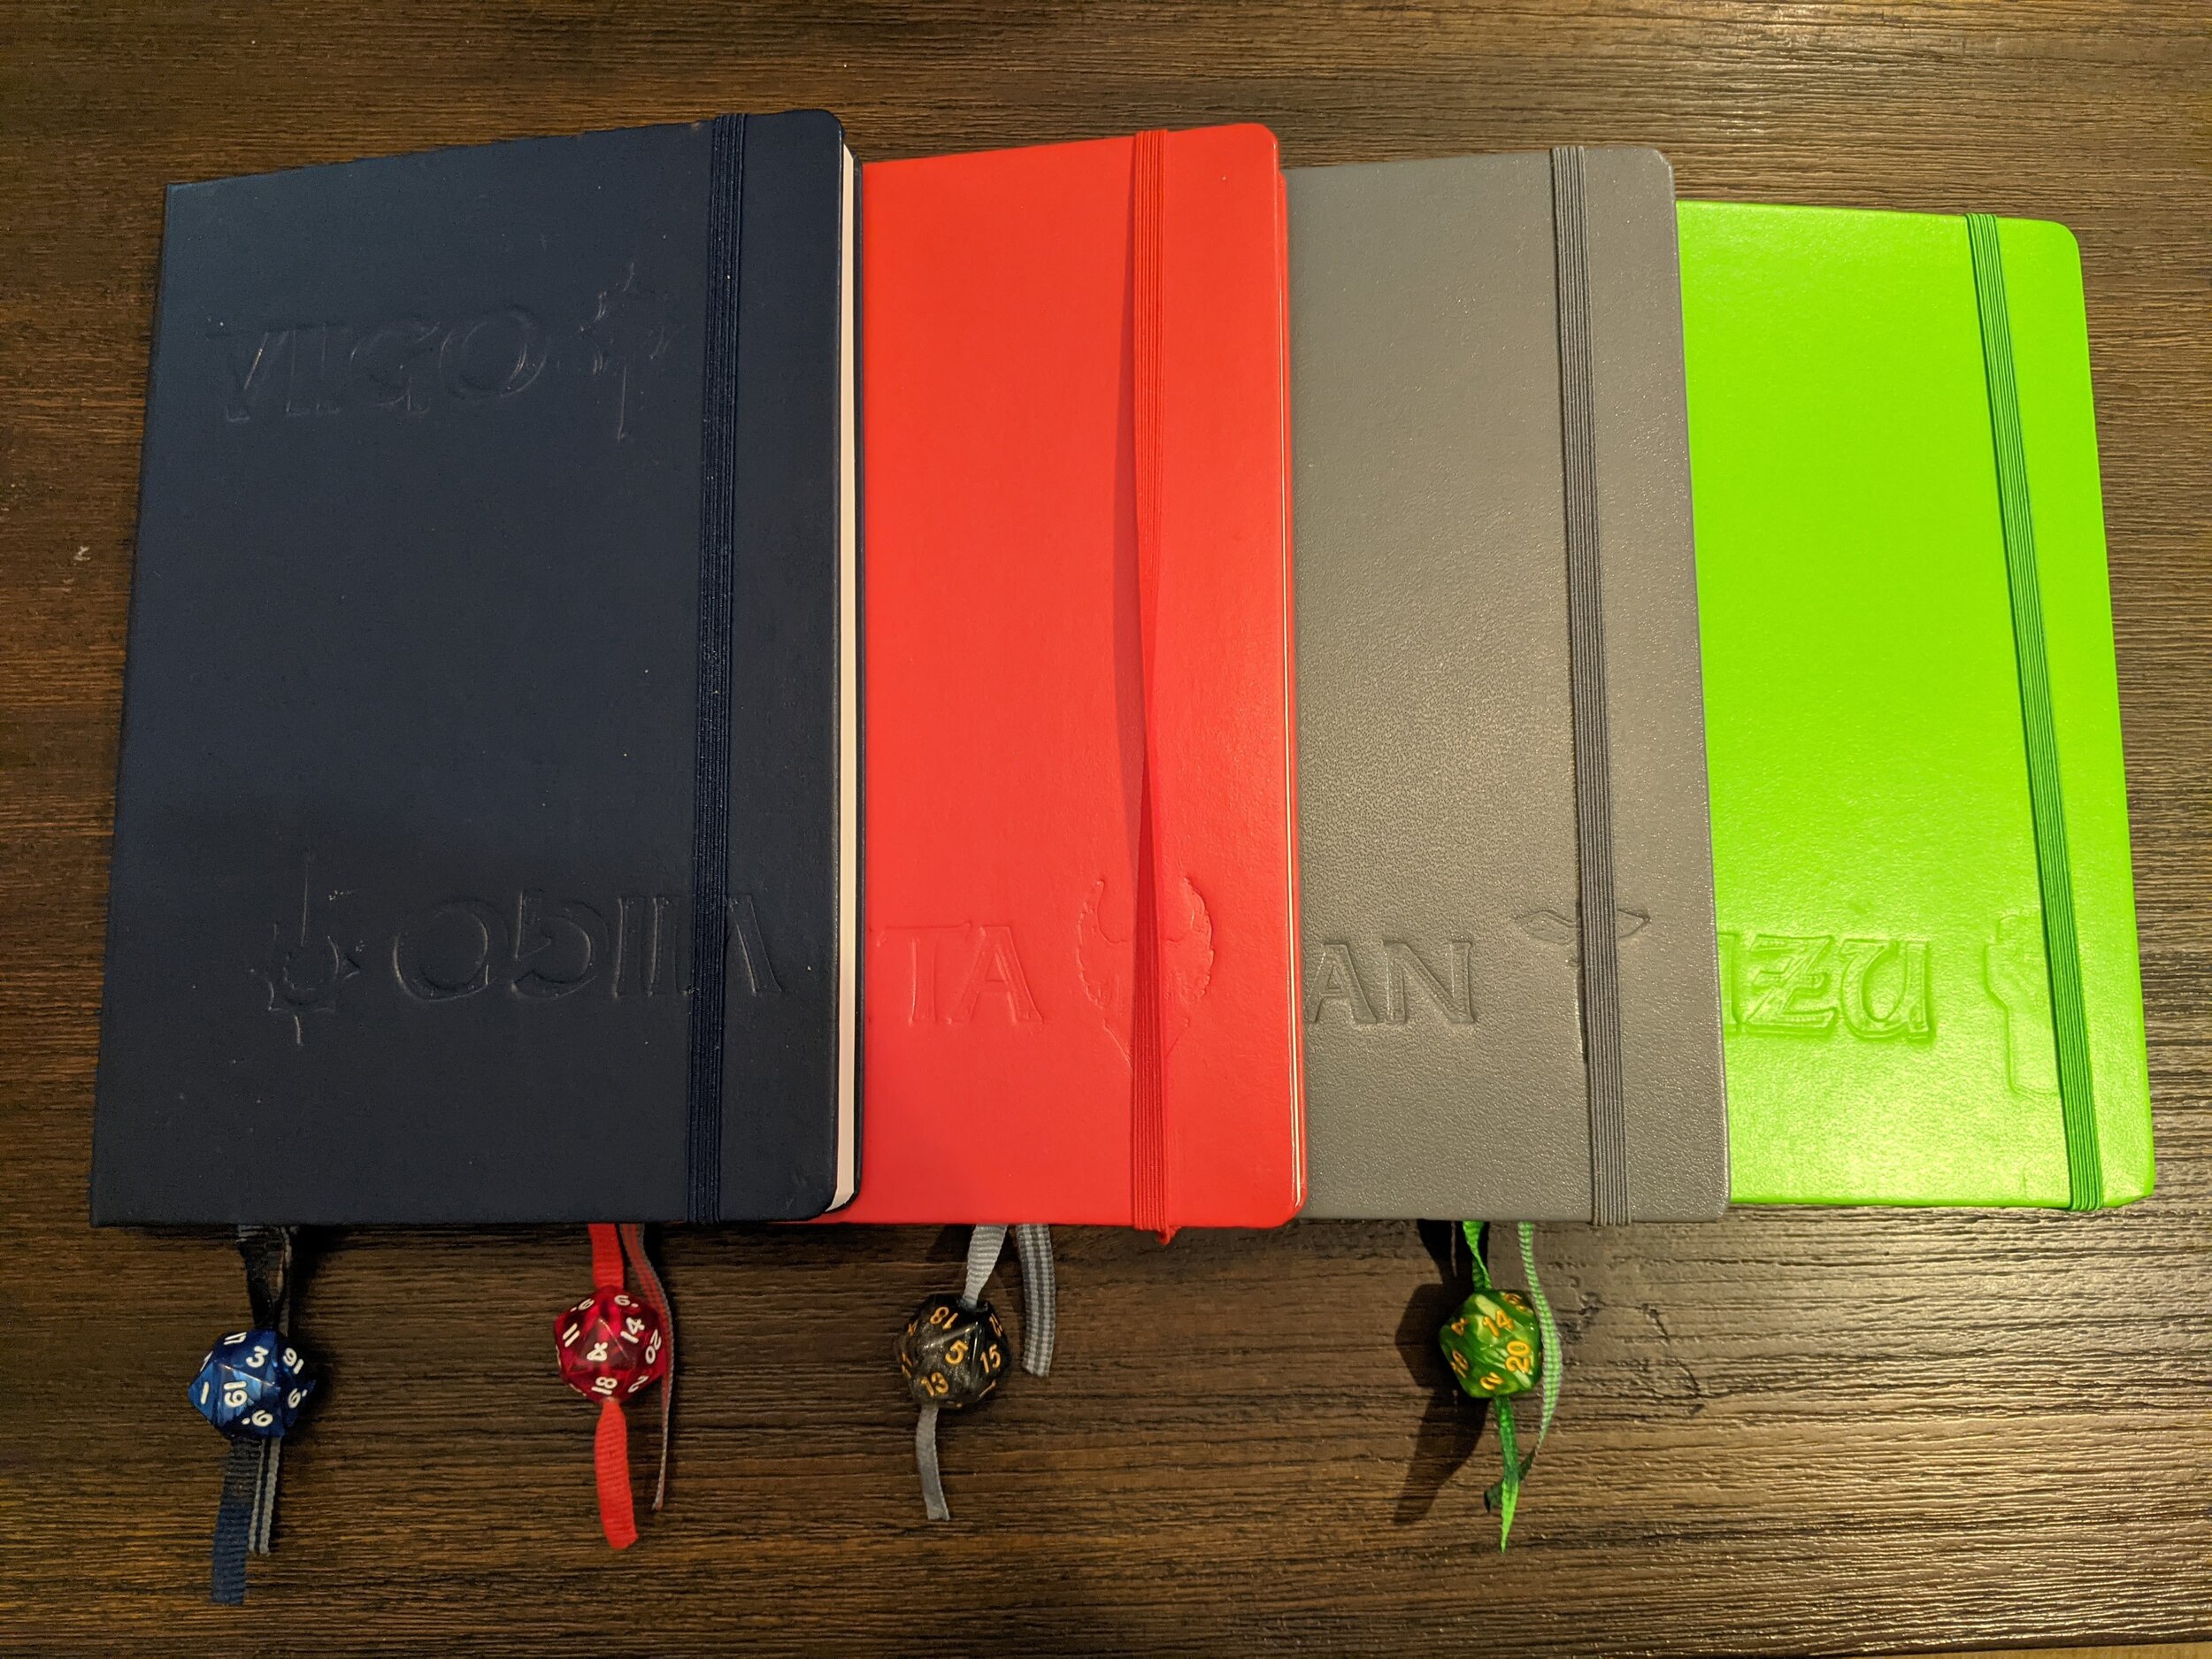
These are Leuchtterum notebooks and are my go-to for notetaking (along with Field Notes). On the front, I debossed their character names and class symbols. And on the page marker, I added a d20.
If you want to make one of your own I have all the steps below. It does require a 3D printer. So if you don’t have one and would like me to print a design for you or you’d like one made, shoot me an email at dungeonmastersjournal@gmail.com and we can work things out.
Making Custom Player Notebooks
Creating the Design
I used gimp to put this together. It could probably have been done in something like Word or Powerpoint, but I’ve been using this program a lot lately (I run all my map encounters out of it) so it just felt natural.
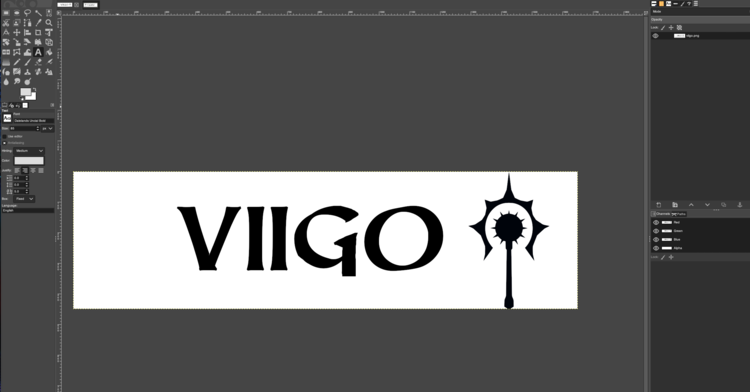
- To prepare the image, I created a New Layer that was 1.5 inches high and 5.5 inches wide. This mapped to the width of the notebook and was my preference for height.
- The font used is Dalelands Unical Bold
- Text is 300px and right justified
- Icons came from here and were imported as a new layer with a size of 450 pixels
Once you have the design you want, you then need to export the image as a png and then open that file as a new image in gimp. I know it sounds strange but I found this is the easiest way to make any changes. The alternative is to combine all the layers in your ‘working’ version and thus lose the ability to edit any further.
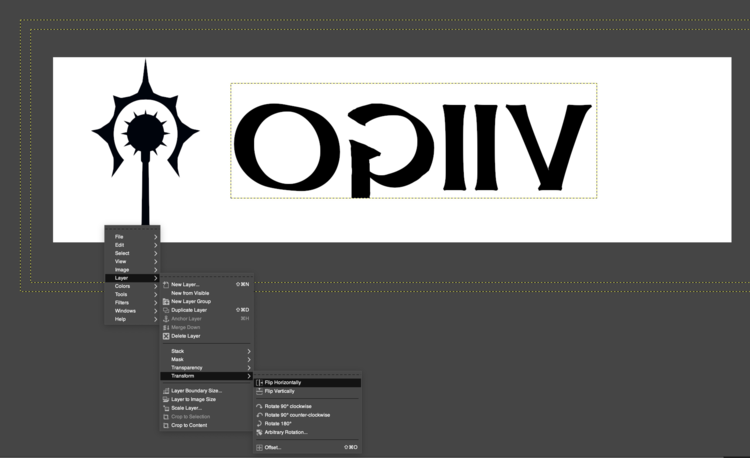
With the new image opened you then need to flip the Layer horizontally. You can do this in gimp by going to Layer > Transform > Flip Horizontally
With that done, export the new png and you can move on.
Creating the 3D Printable file
There are a few steps we need to take before we can start printing our design. 3D printers read gcode. This is produced by slicers that require a file type called STL. You can get STL files of your design by using CAD software.
That is a lot of steps but it really isn’t that bad.
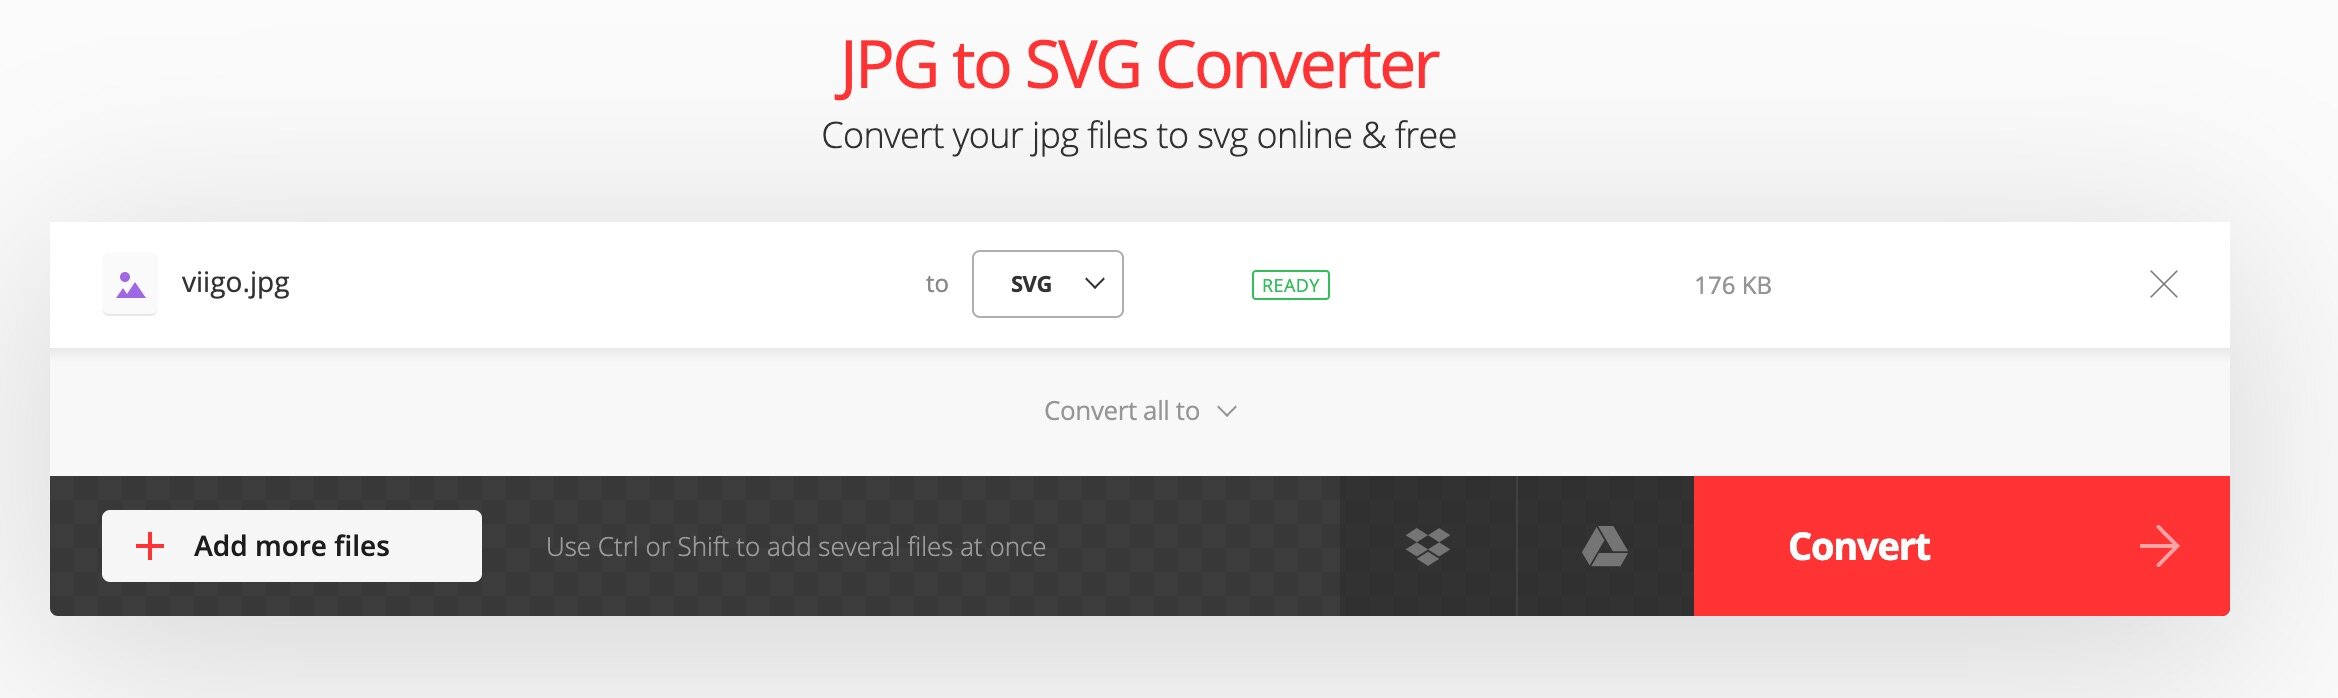
The CAD software that I am using for this is TINKERCAD. It is a free browser-based CAD design tool aimed at beginners. The downside of using this is that it will only allow you to import SVG image files.
So we first have to convert our PNG to an SVG. This is pretty simple as far as things go. Head over to convertio. Once you are there go on and upload your file and hit convert. It will do its thing and then you can download the SVG file of your design.
Importing Into TINKERCAD
Head over to TINKERCAD and create a new design. In the top right corner click IMPORT and choose your file. It will then ask you to change the dimensions of the image. Instead of changing the width, I set the length to 38.1 mm. This is equivalent to the 1.5-inch height I am looking for.
Then hit IMPORT.
Creating the Back Plate
The next step is to create a backplate for your design. Without it, each letter would be its own piece. To make things easier to line up and clamp1, I added this backplate.
First, hit the TOP plane of the cube in the upper left-hand corner. This will give you a head-on view from above.
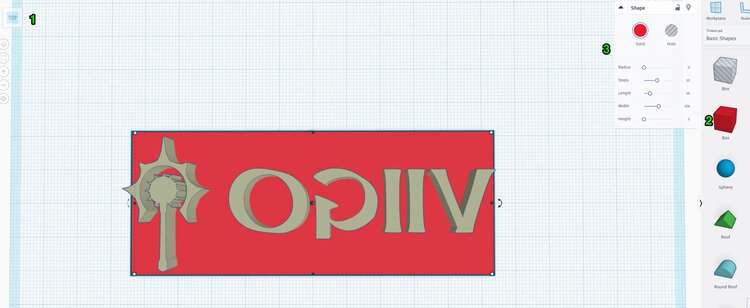
Second, create a box in your workspace.
Third, click the box and modify its dimensions. I made mine 42 mm long, 106 mm wide and 2 mm thick. The width is variable based on your design.
I then clicked on my design and changed its height to 6 mm. I found this to be a good height when pressing the design into the notebook cover.
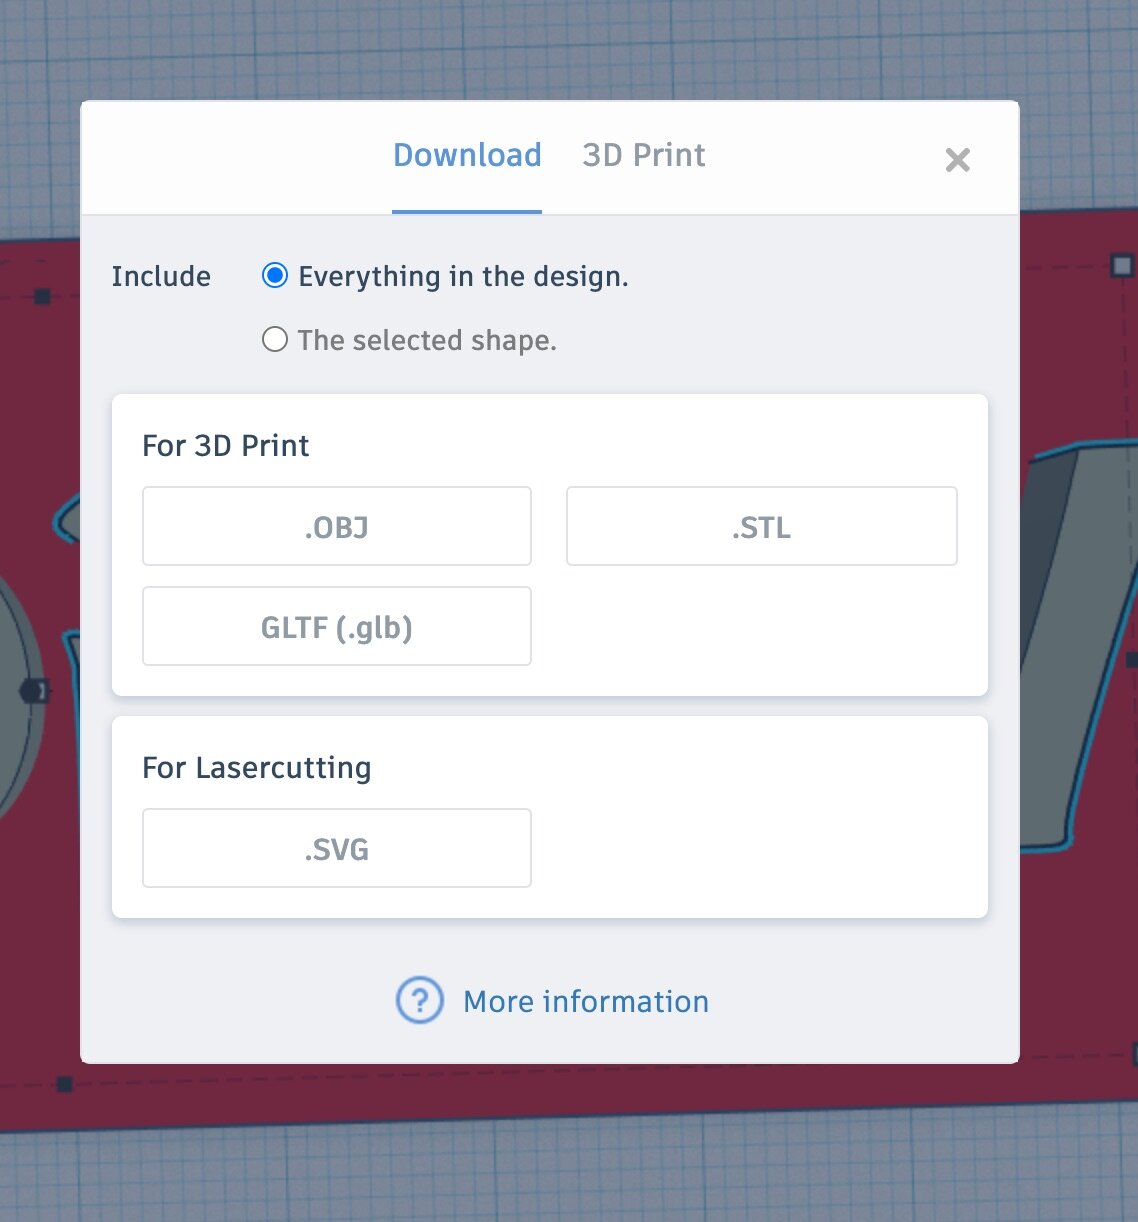
Exporting The STL
Once you are satisfied, click Export in the upper right-hand corner.
Make sure you have everything in the design selected. I routinely forgot this and had to go back.
Select .STL and then download the file.
Printing the Design
Generating The GCode
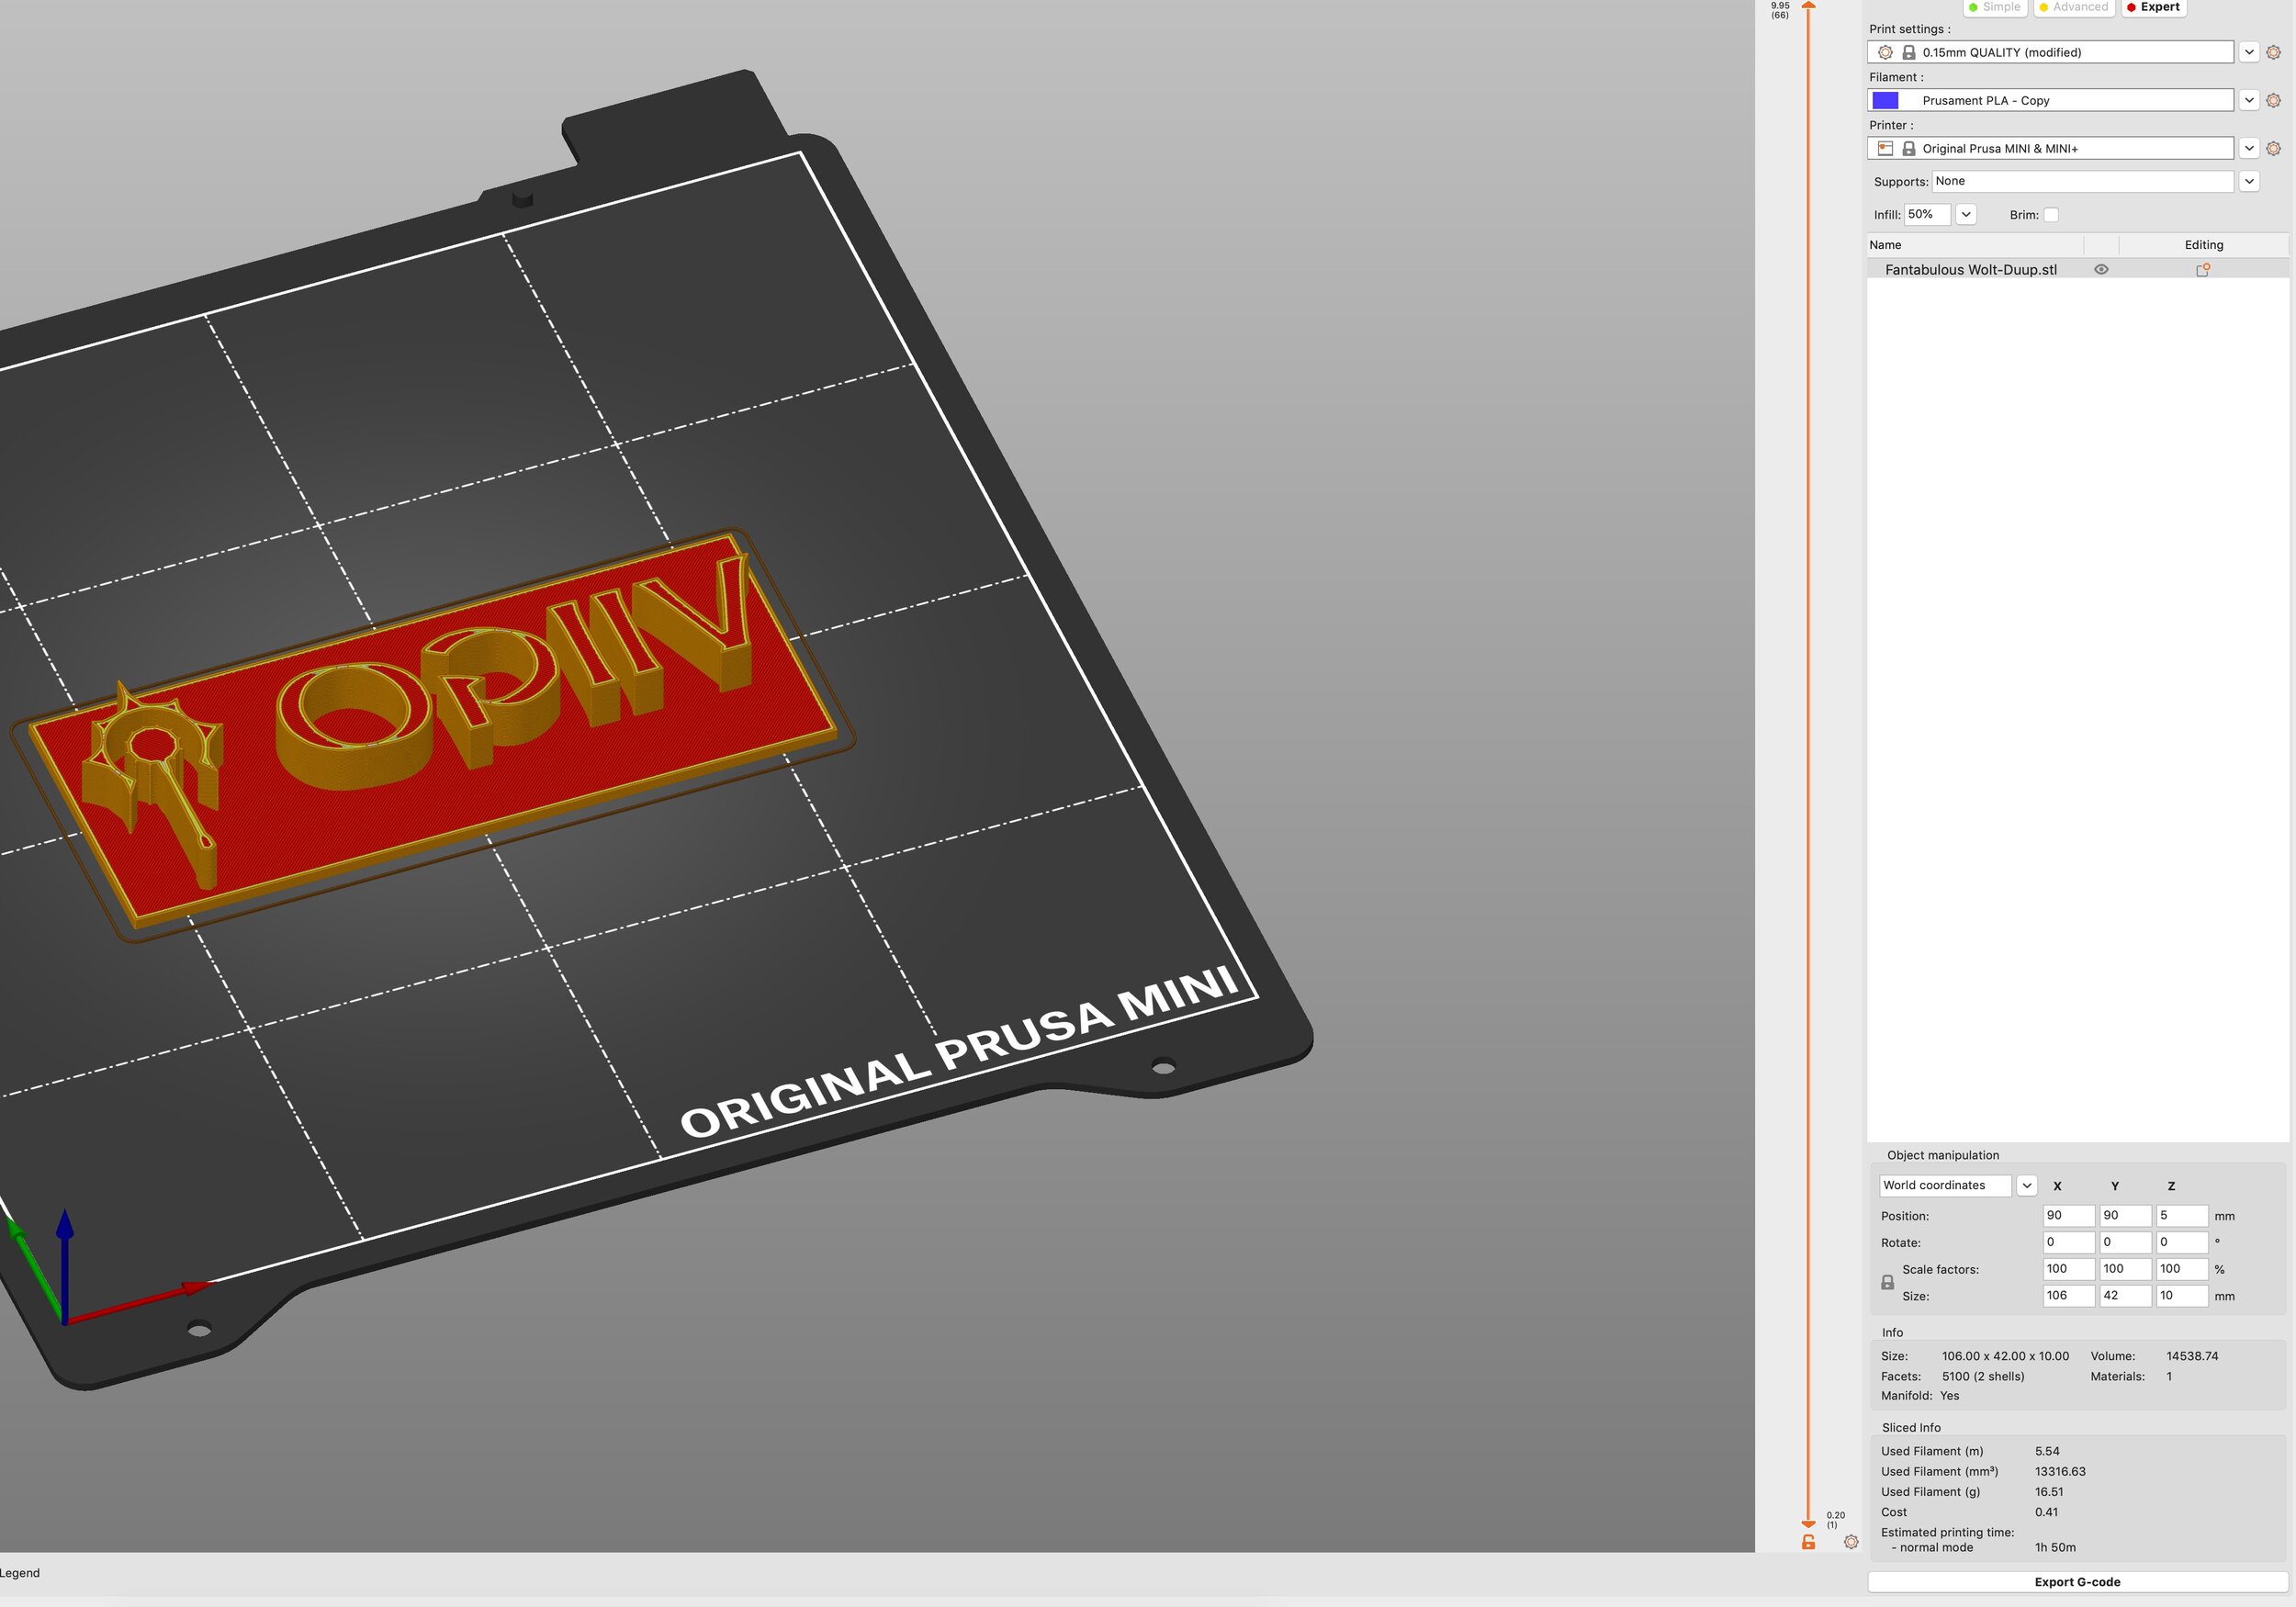
I have a Prusa Mini 3D printer and for quick prints, I prefer to use the Prusa Slicer. You could use any slicer you prefer.
Import the STL file into your slicer. You shouldn’t need to do anything to it at this point. The only change that I made was to up the infill to 50%. I did this because I didn’t want the design to break when I was putting a lot of pressure on it with the clamps.
Then hit Export G-code and you have your printable file.
3D Printing
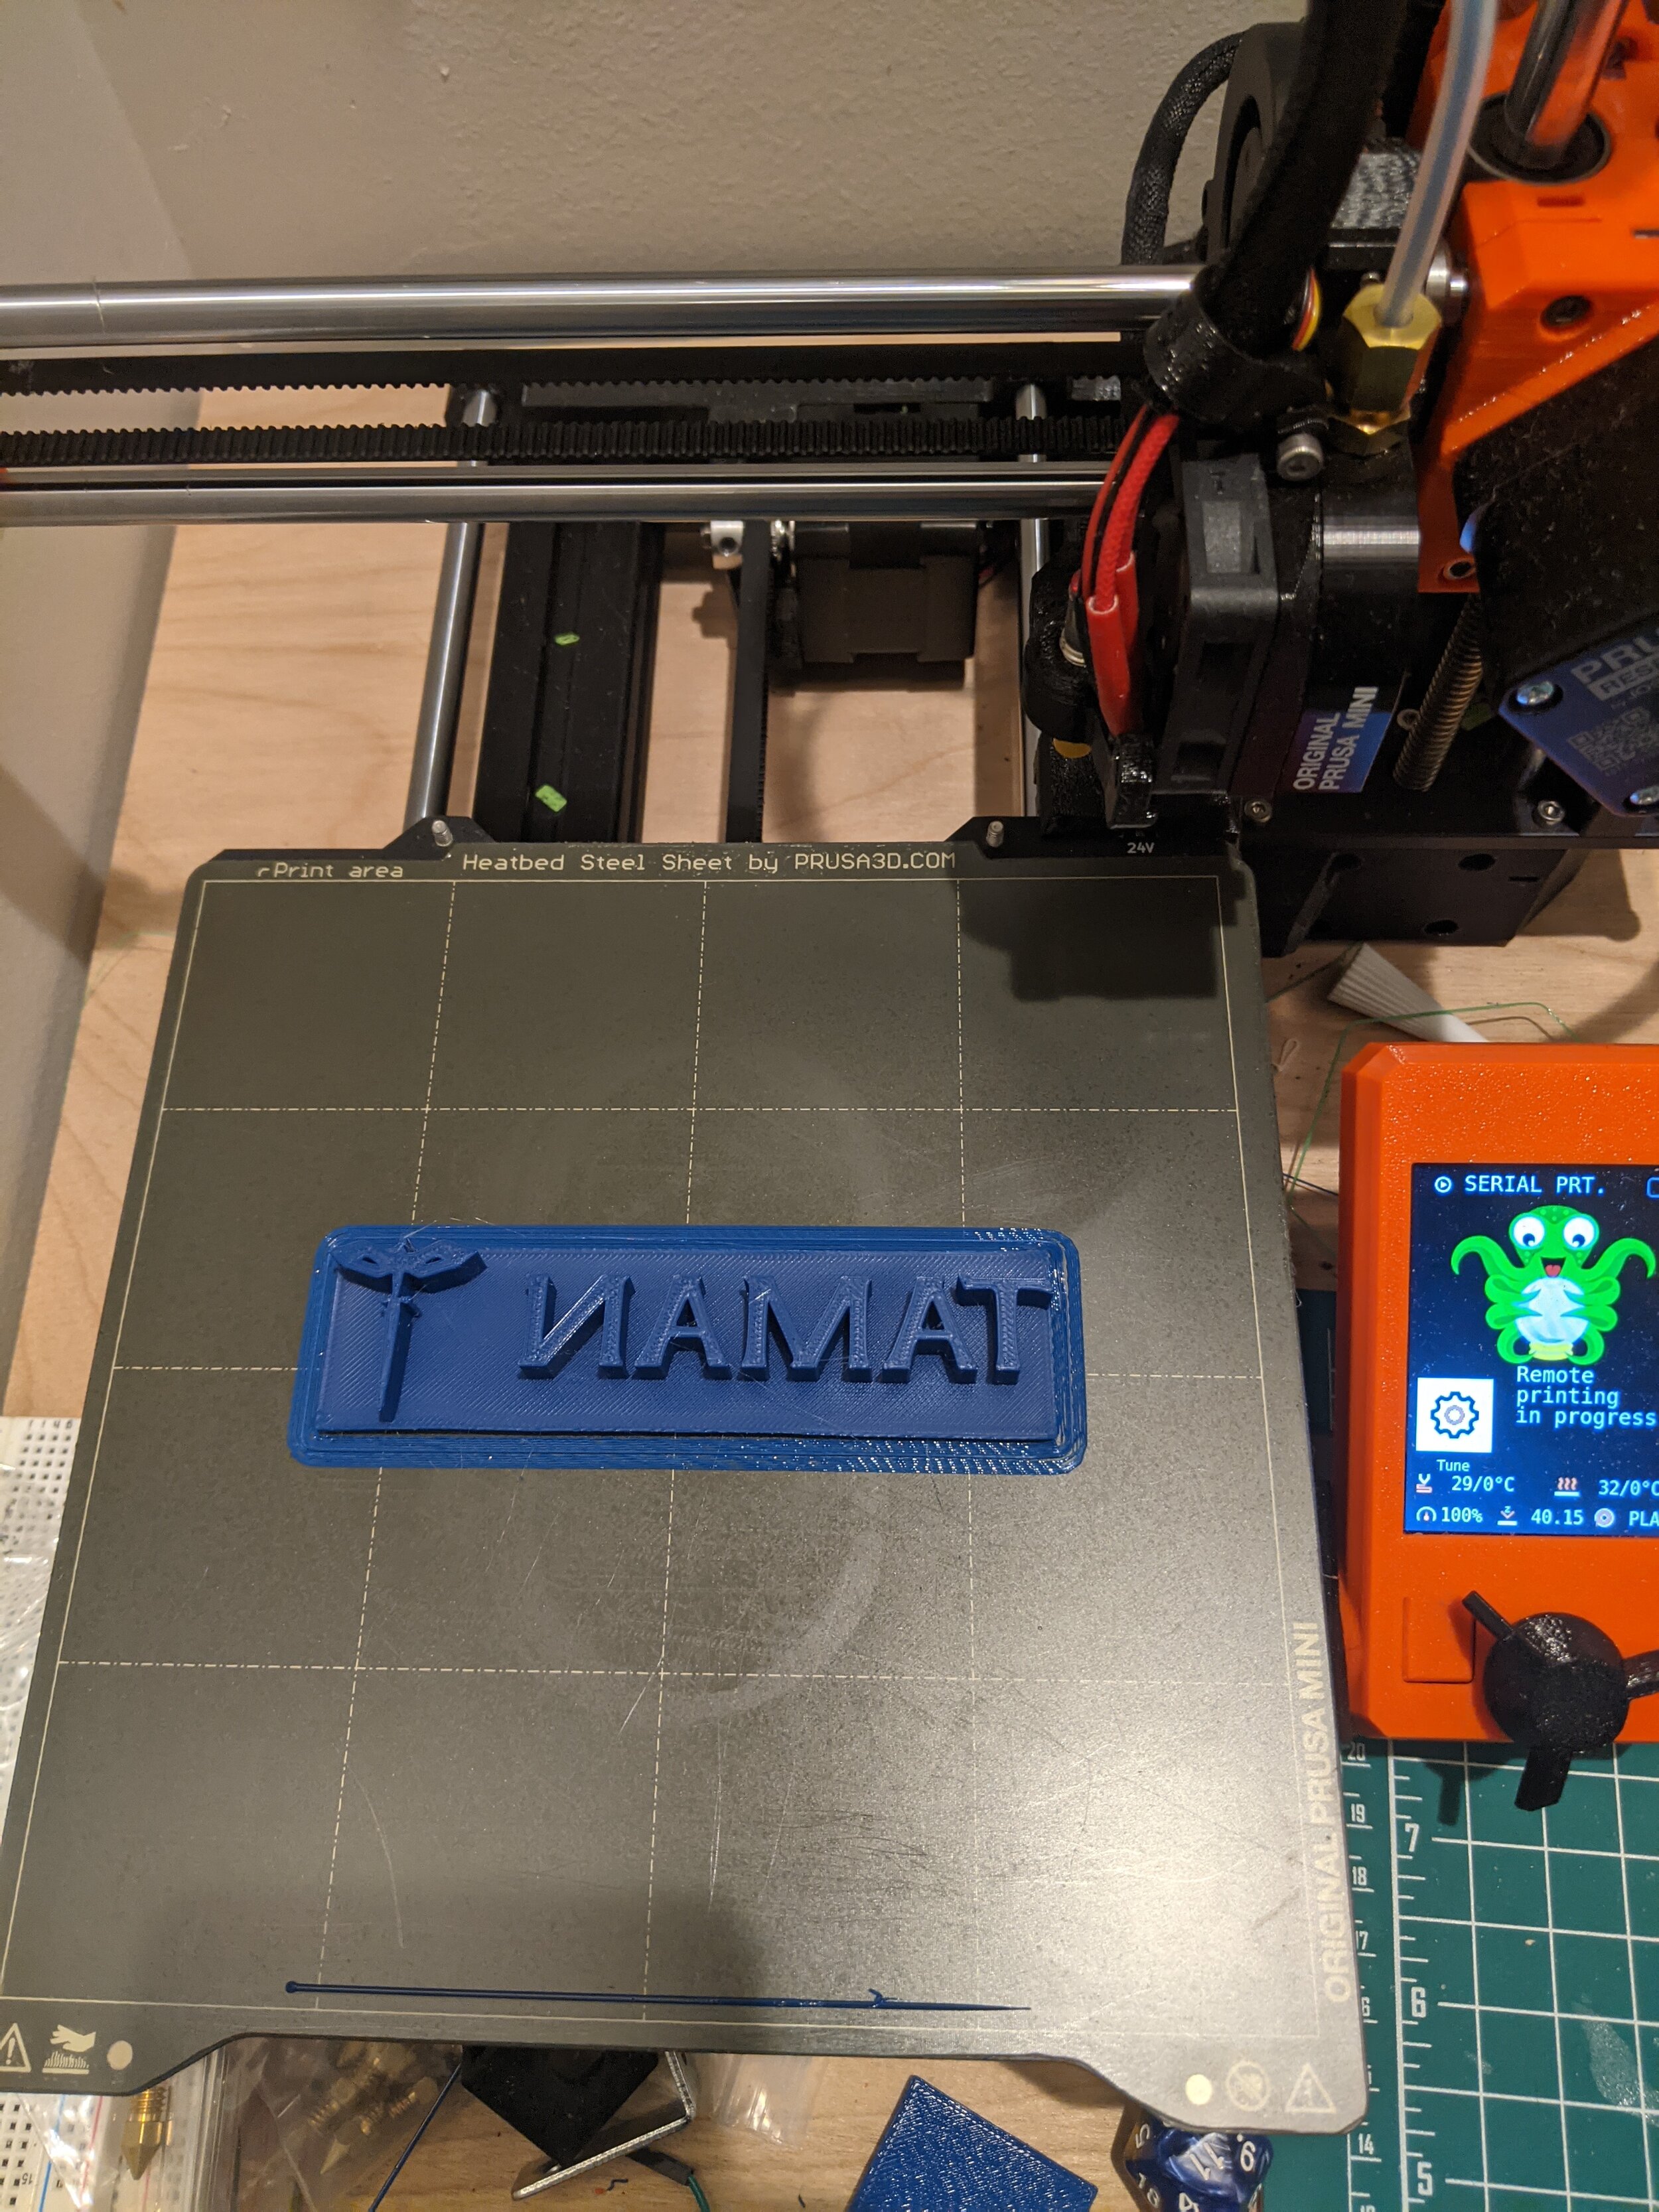
I then loaded my file into octopi and hit Print. The color of the filament doesn’t matter here so there really weren’t many considerations.
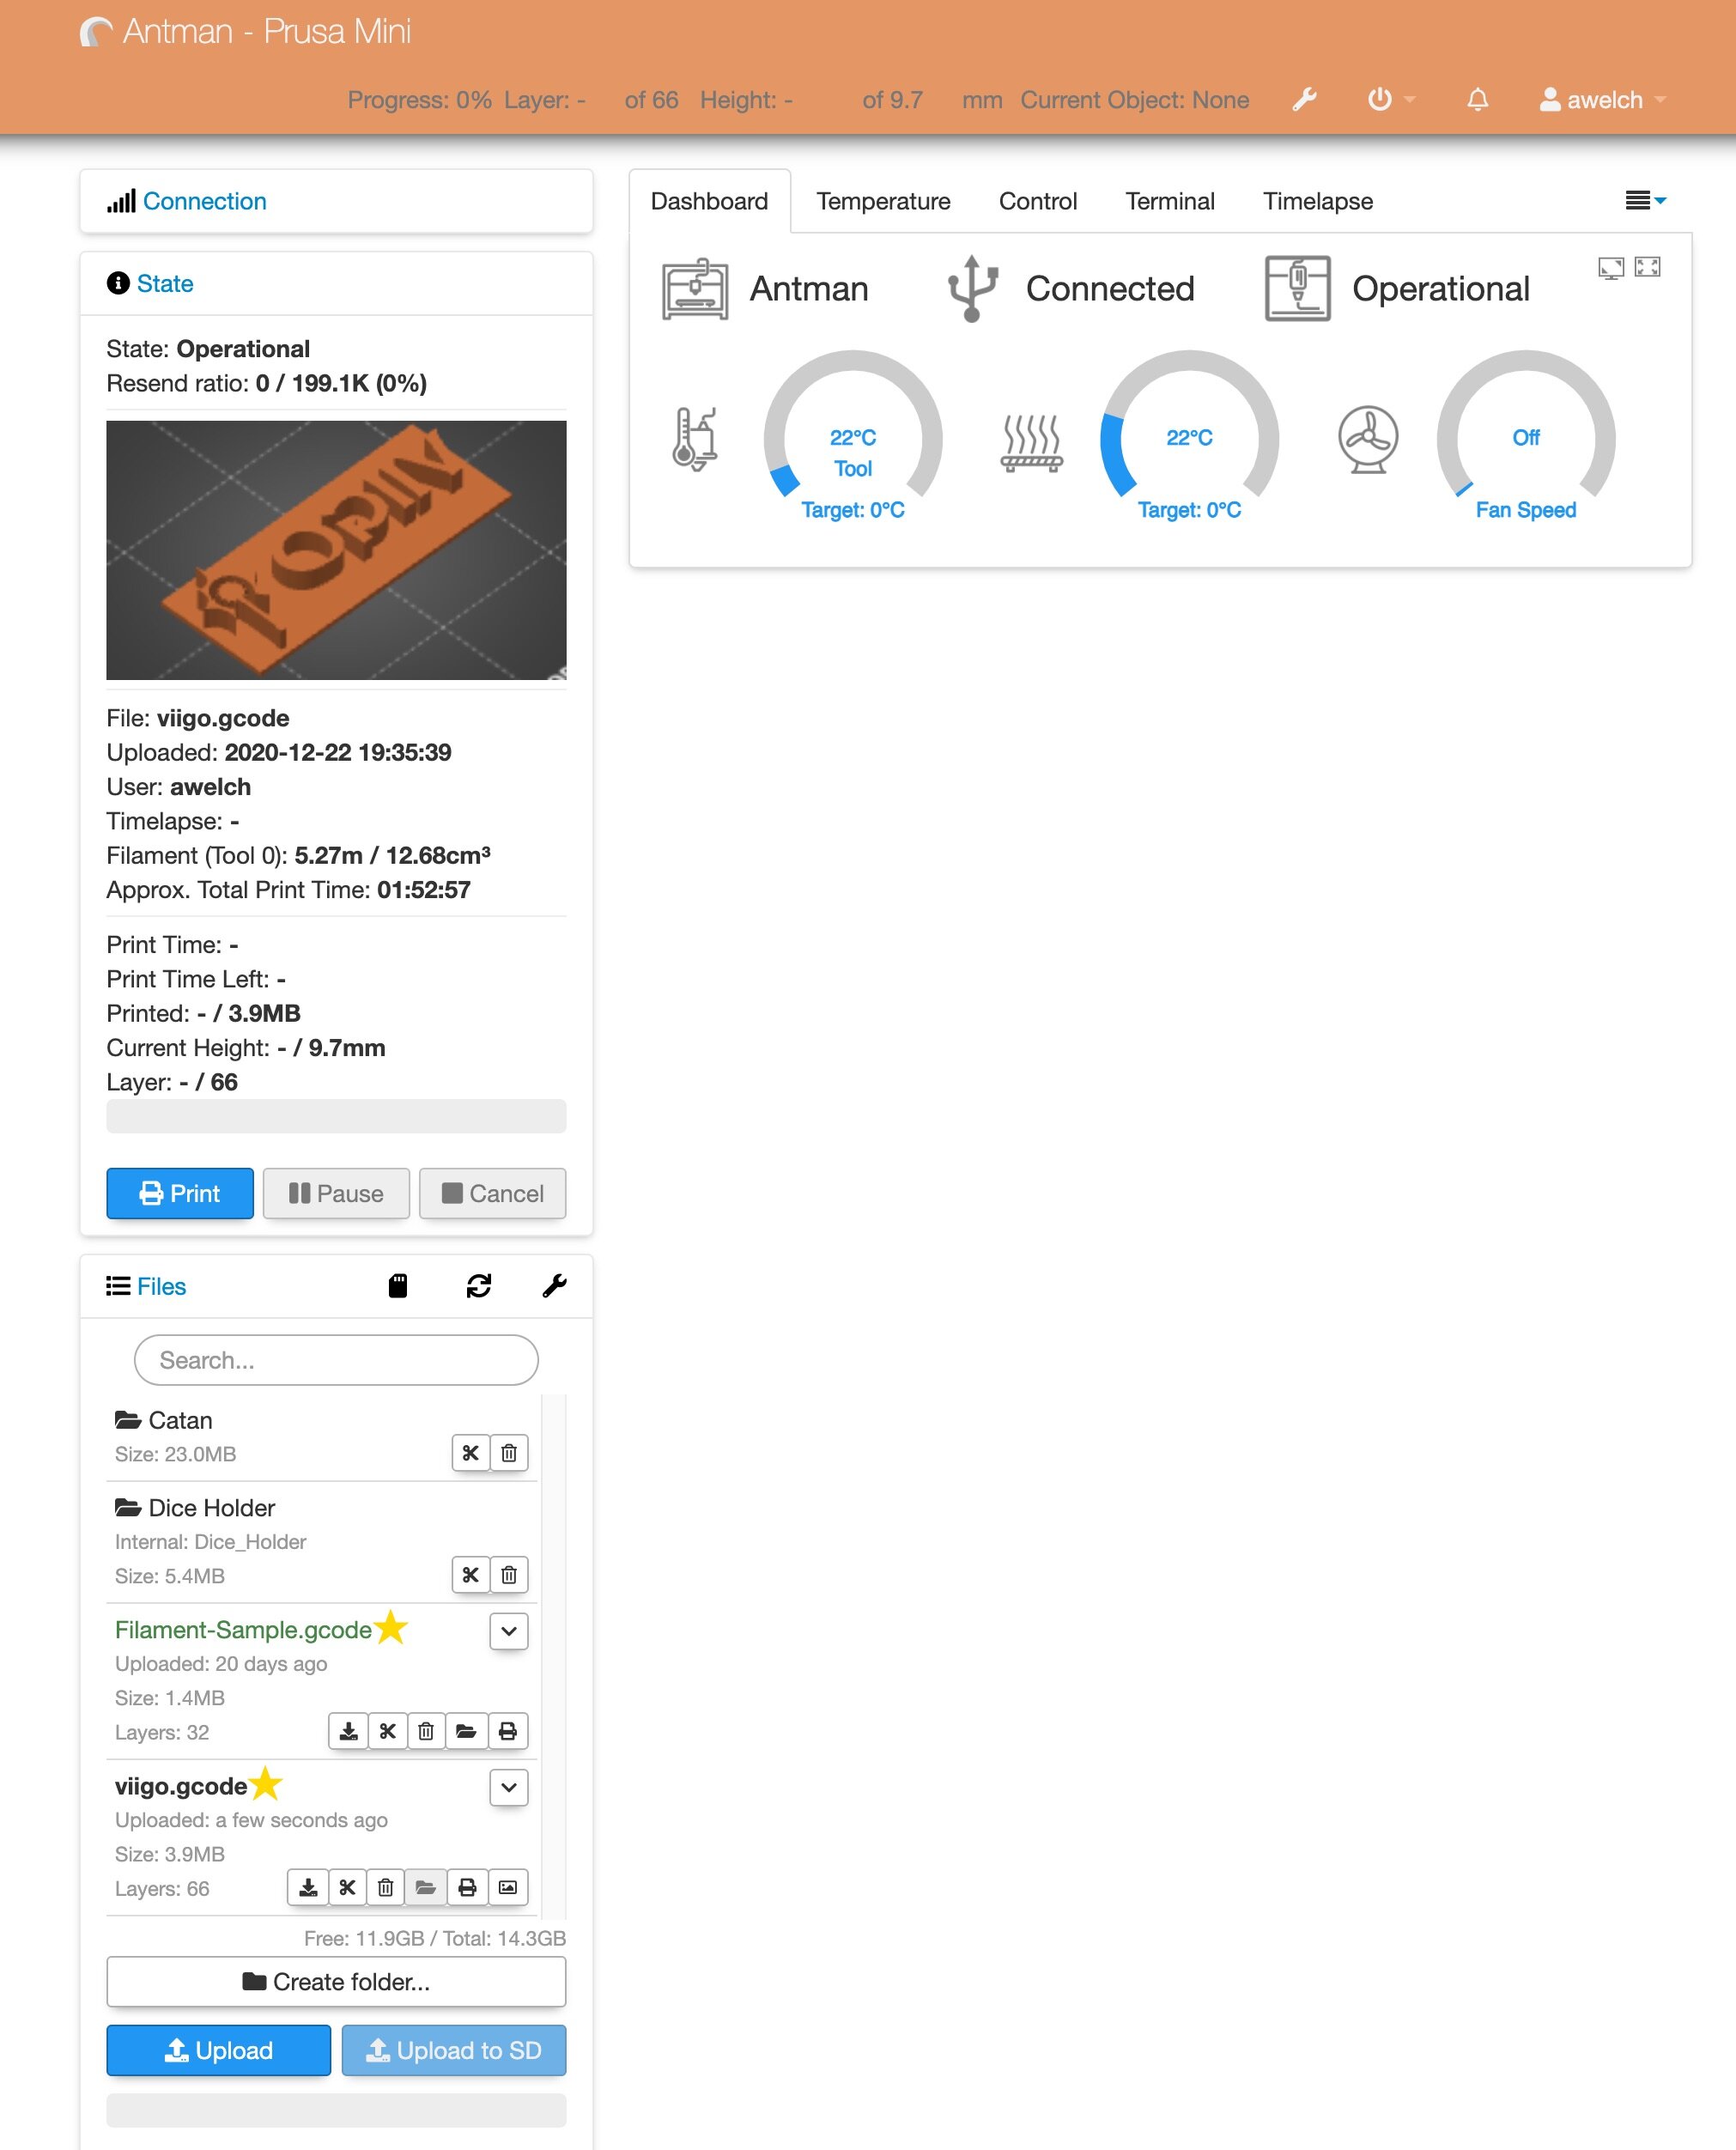
An hour or so later and I had my design.
Debossing
Debossing is when you imprint an image onto another material. This is very commonly found in business card designs.
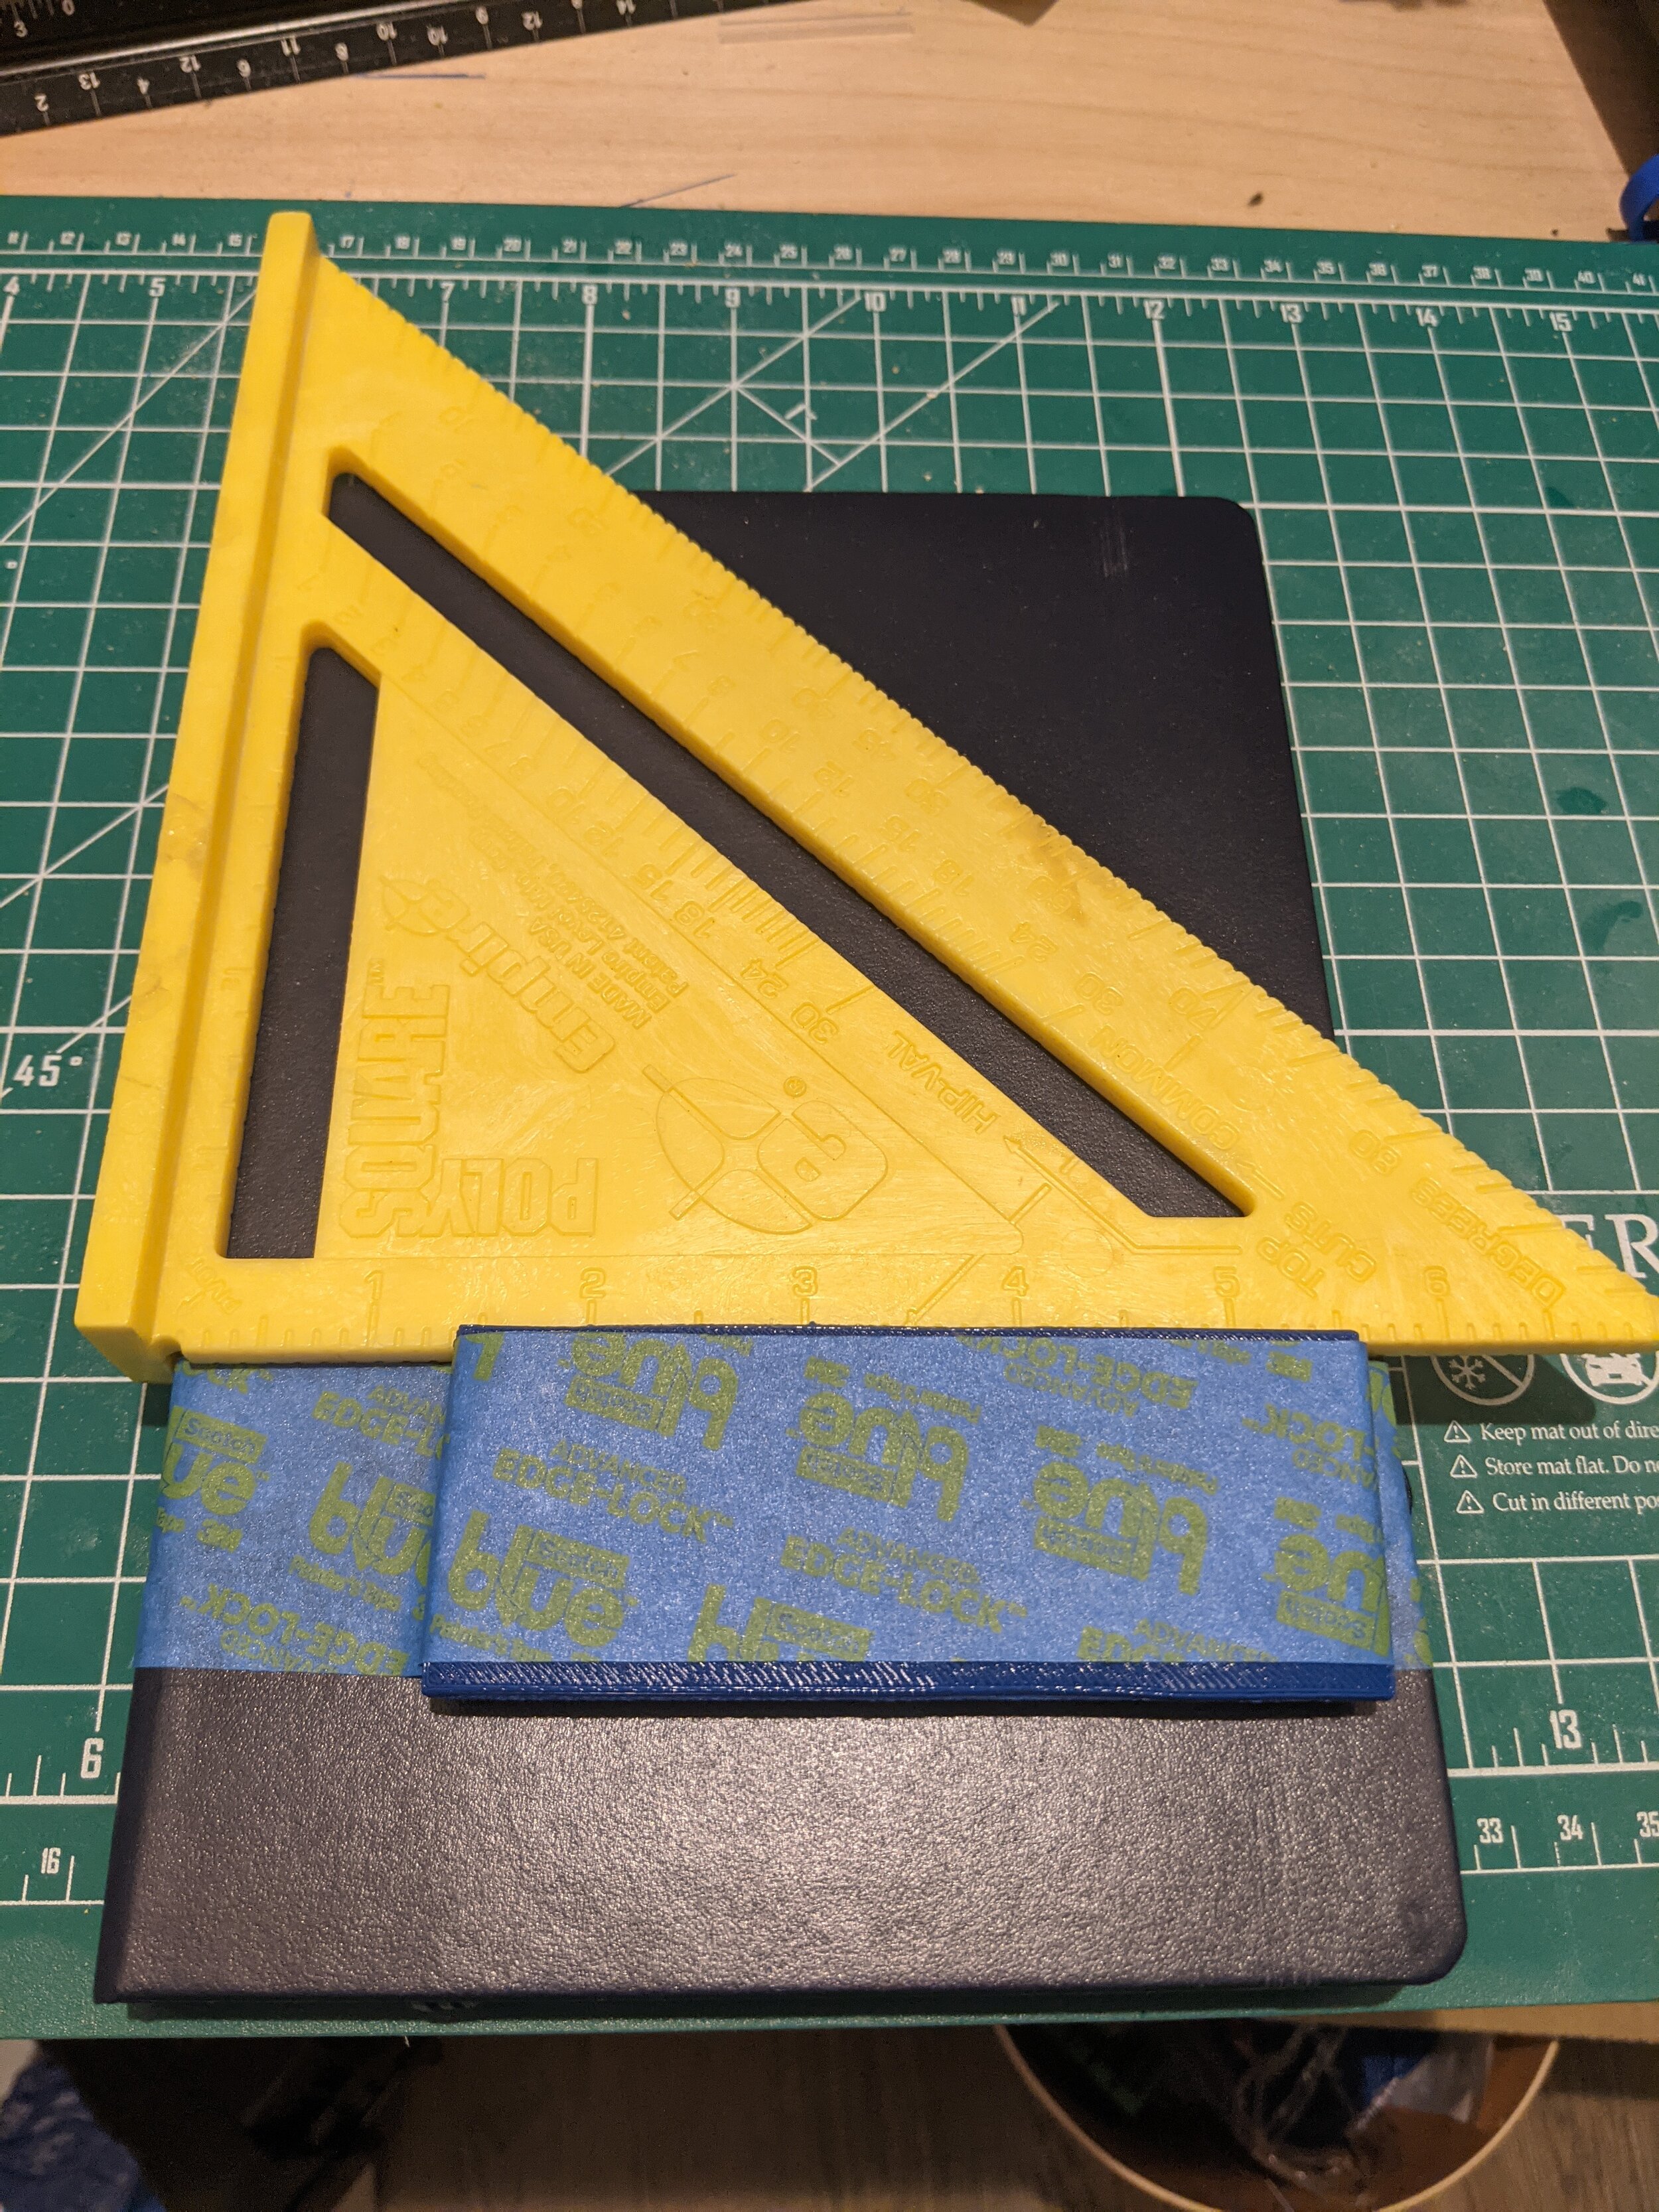
Lining It Up
I used a speed square to line up the design and then used painter’s tape to secure it in place. Then I double-checked my measurements. I opted for 1/2 inch from the right side and 1 inch from the bottom.
Clamping
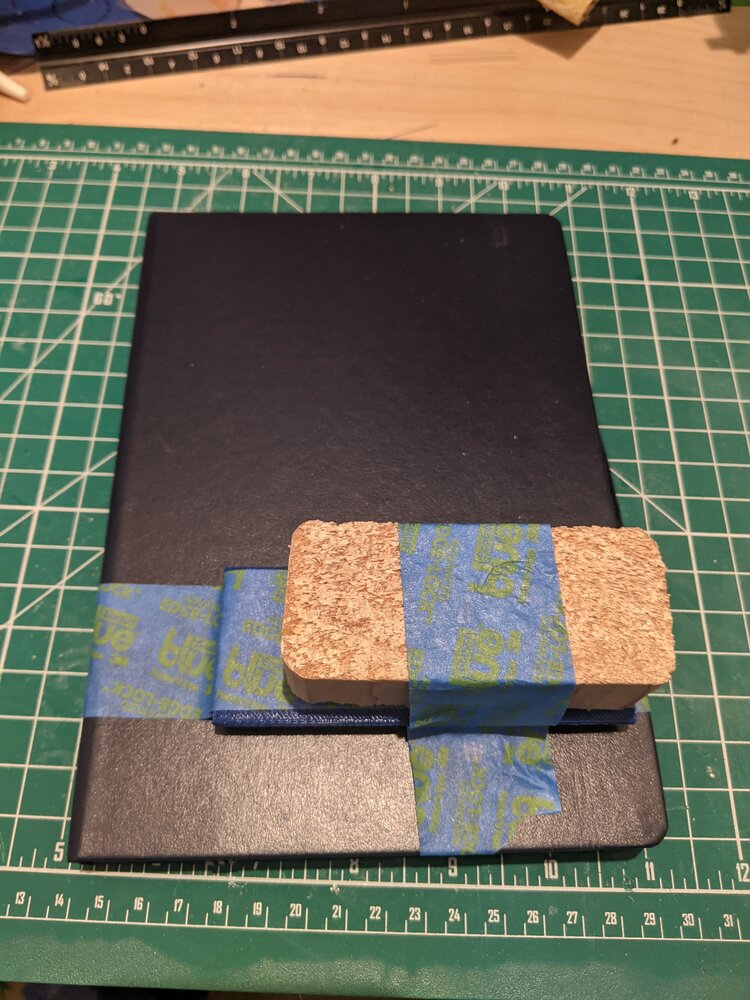
I taped a block of scrap wood to both sides of the cover in order to spread out the pressure from the clamps.

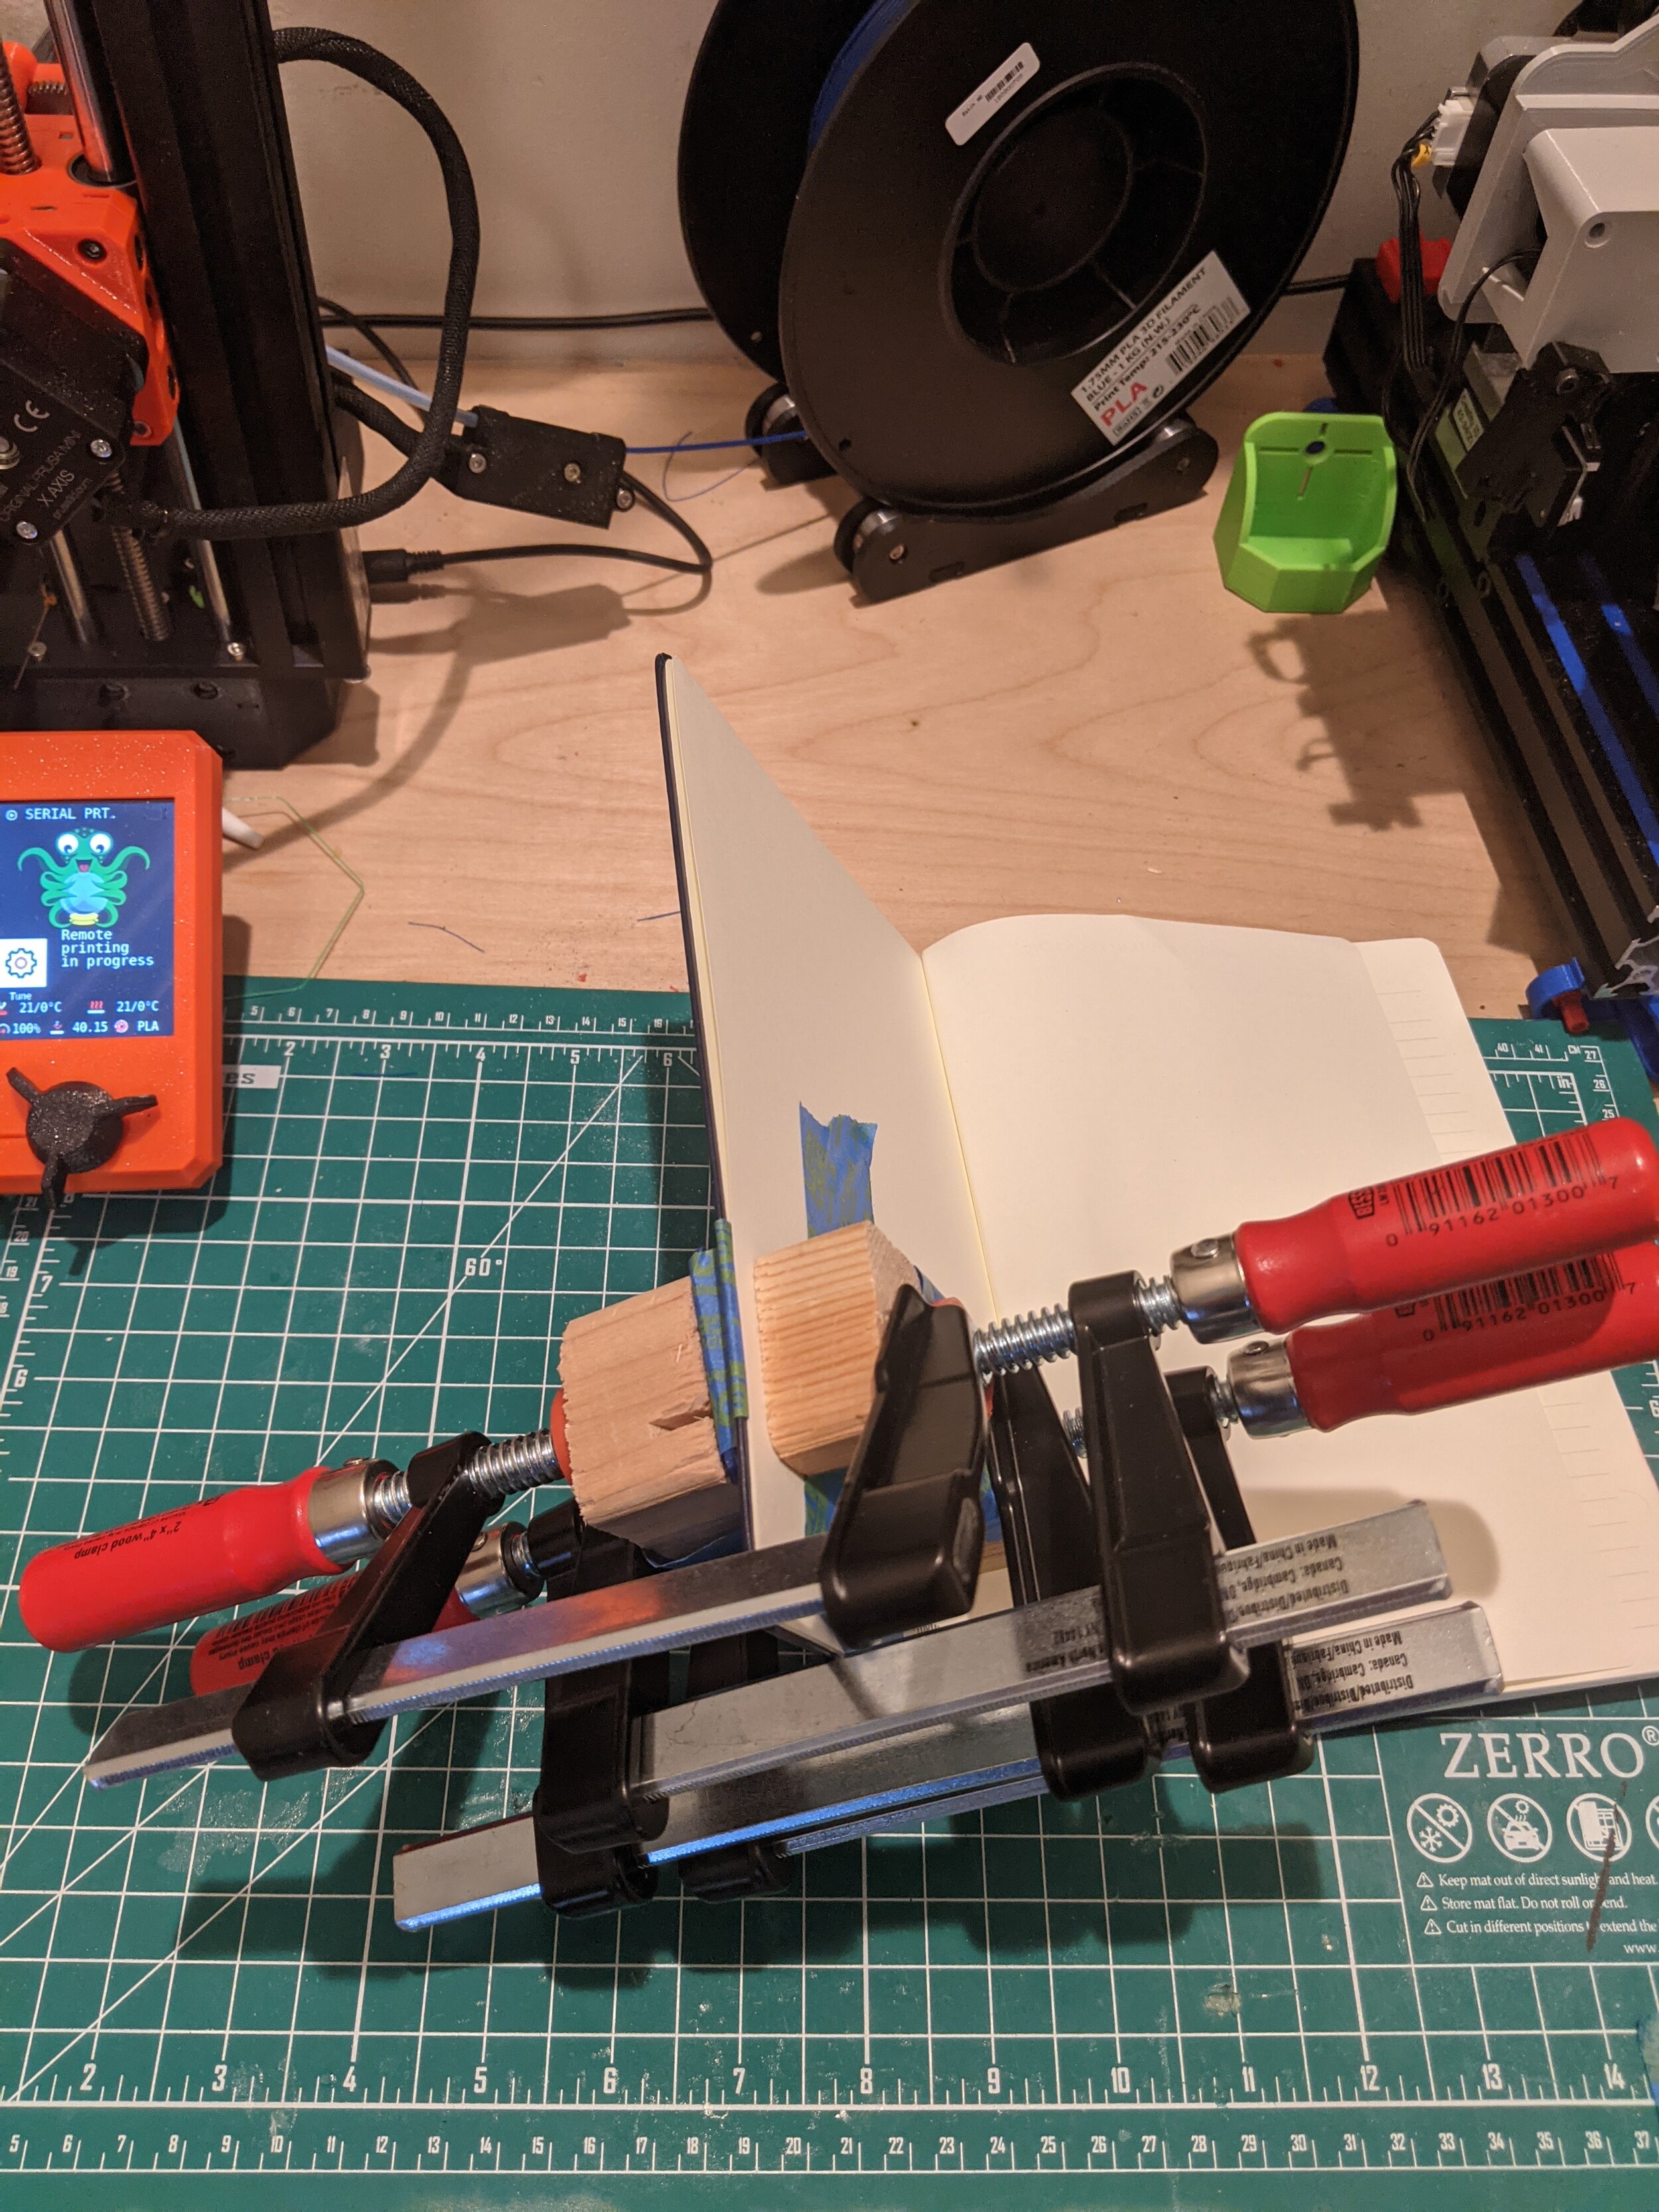
Then I went to work with the Bessey clamps. I ended up using four, alternating the orientation.
I would recommend starting off by tightening them just enough to be held in place. Then, once you have all four secured, work your way up and down the line tightening them as much as they can go. You’ll have to do this a few times.
The Dice
Holding the dice in a clamp, I used a power-drill to bore a hole through the dice.
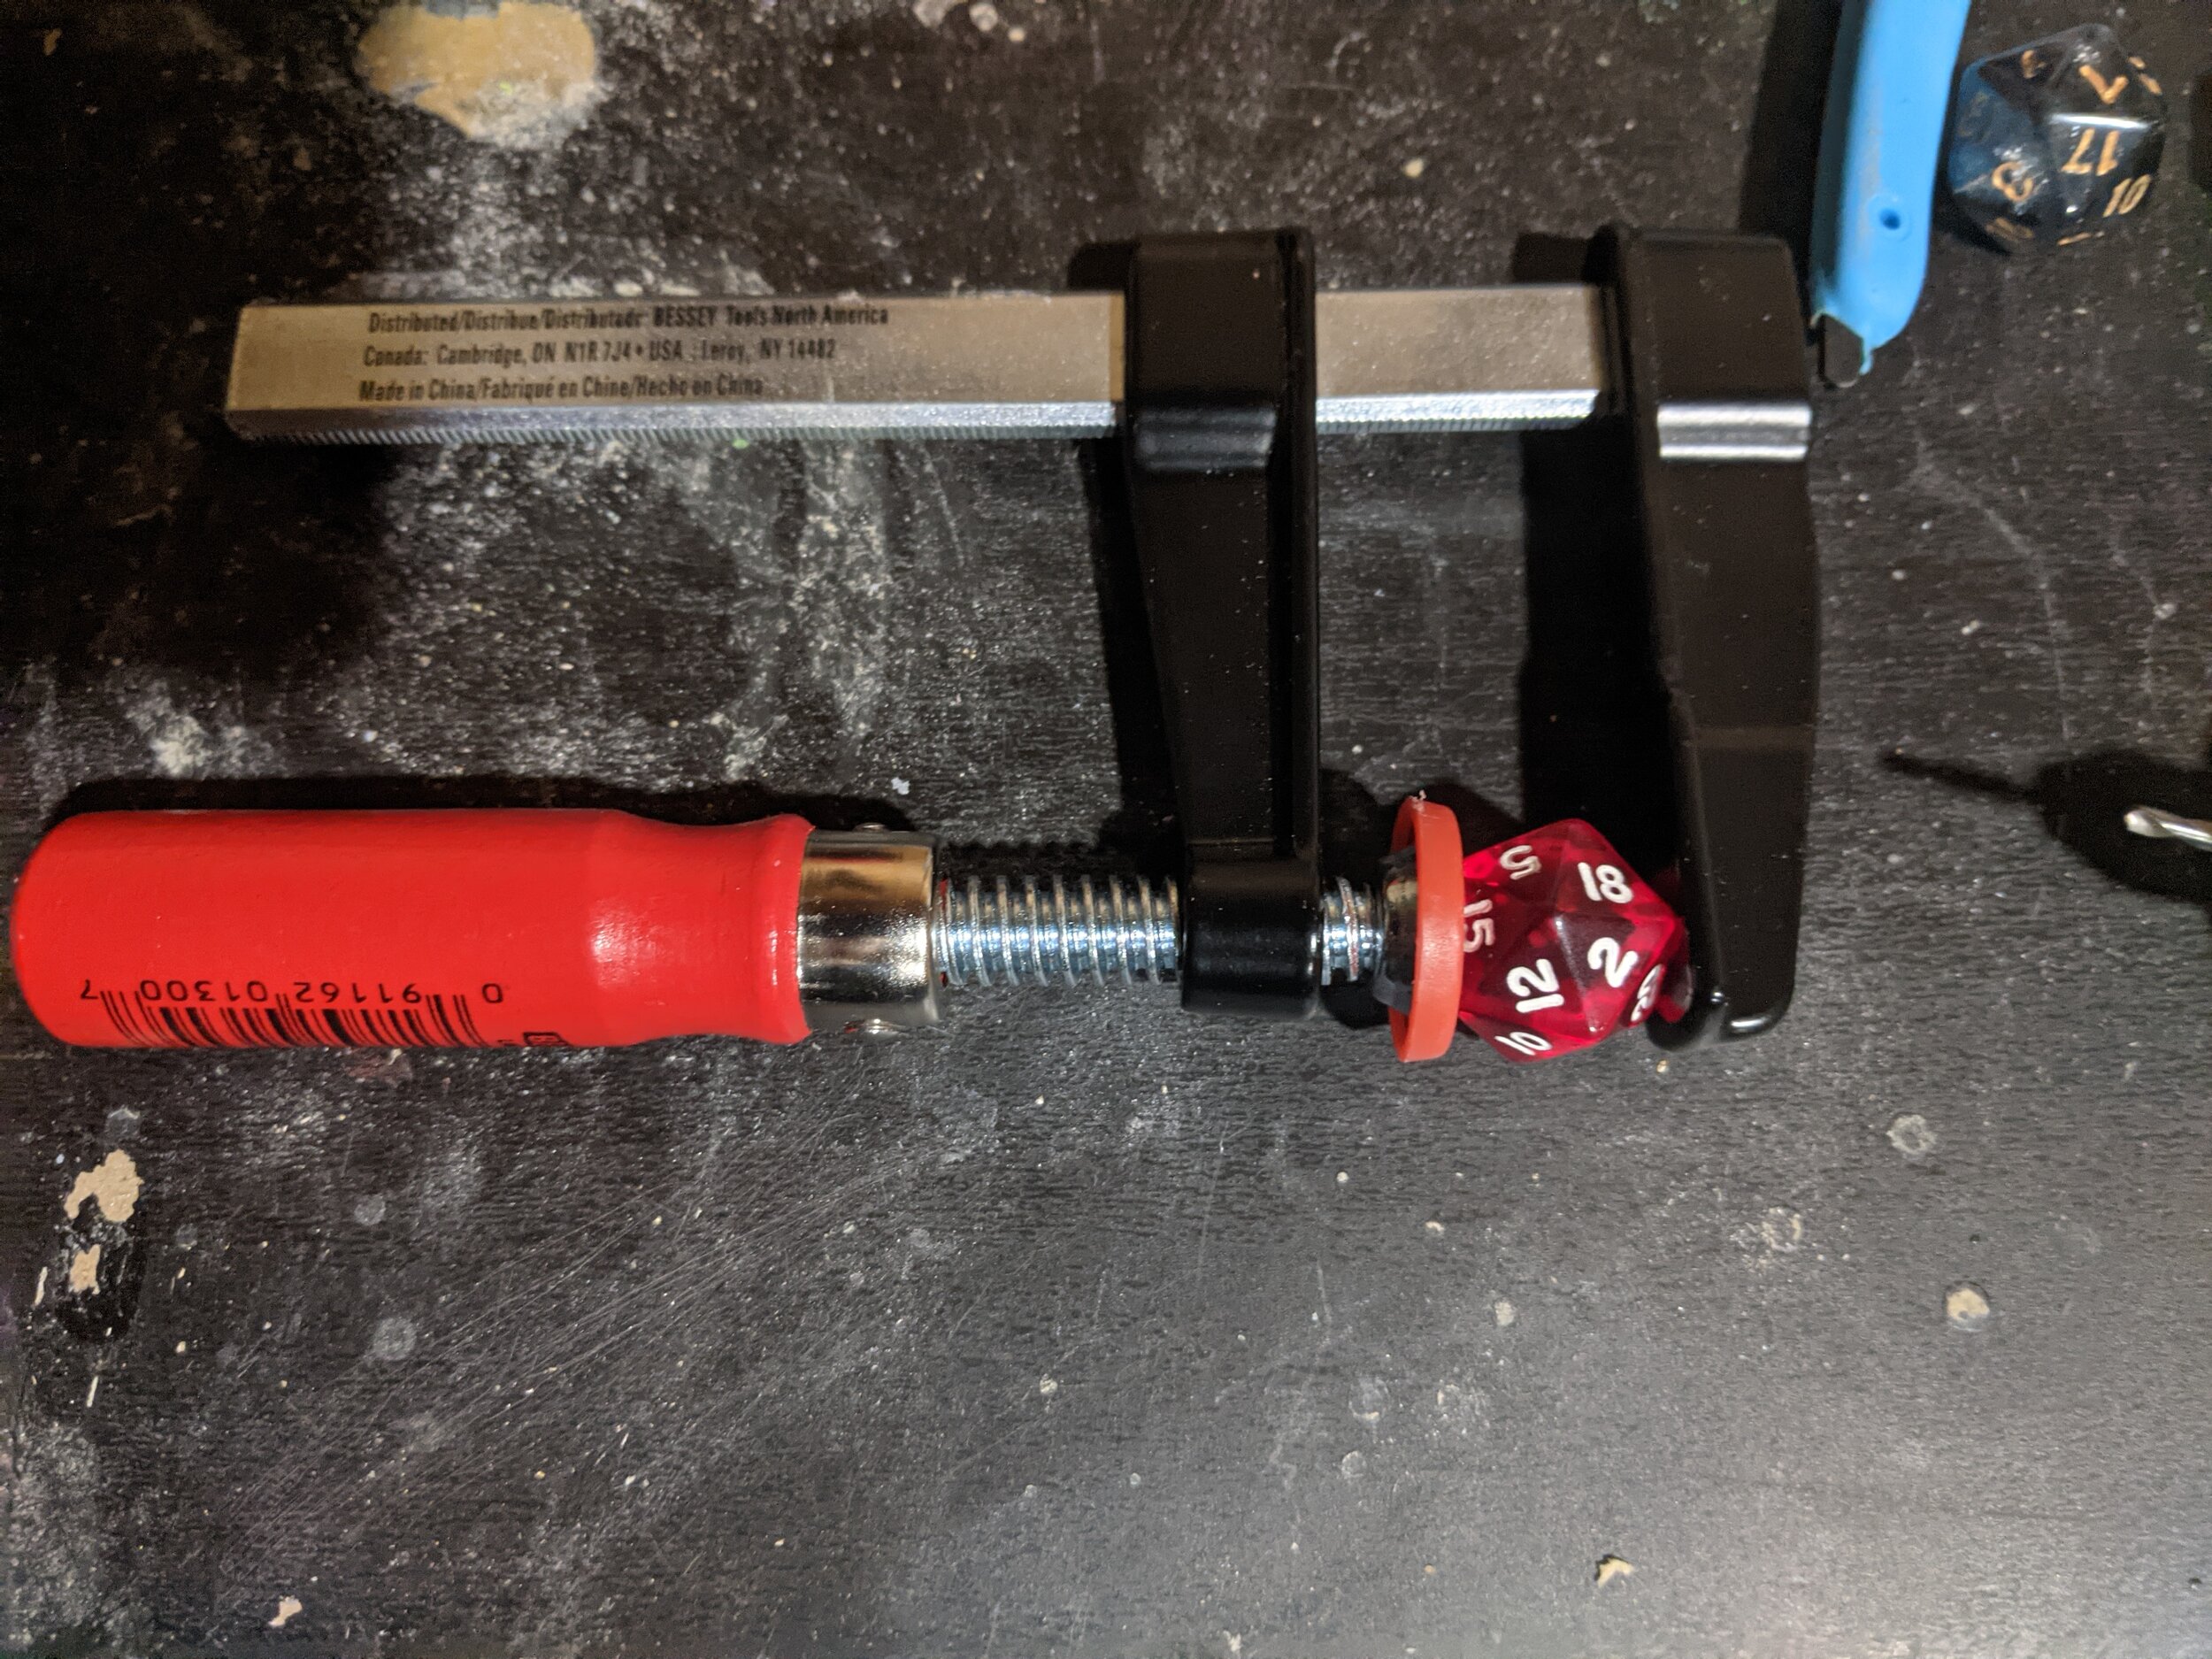
Then I took thread and a needle, tied it to the end of the page marker, and threaded it through the hole. Once the d20 was where I wanted it I took some CA Super Glue and soaked the fabric just below the dice. After the glue hardened, the page marker was stiff and prevented the dice from coming free.
Finishing Up
And that’s it. Here are the four finished products. You’ll notice that I initially screwed up Viigo’s. I had the design upside down by mistake. To correct for that, I tried to make it look like the design was mirrored on the other half of the cover. Ultimately, I really like the look and kind of wish I would have done it for the rest of them.
Member discussion